You've got to love the Chevy big block for its raw ability to make ambitious amounts of bone-crushing torque without breaking a sweat. Information technology besides loves loftier-revving horsepower, giving you the all-time of both worlds.
Most of you who beloved the Bowtie understand the origins of Chevrolet's powerful big blocks, which began in 1958 with the W-Series Mark I at 348ci, followed by the legendary 409 in 1961—and afterward the super rare RPO 427ci Z11 in 1963. (And, yeah, you lot could actually gild ane from Chevrolet.)
At that place were also the Mark 2 and Marker IIS "Mystery Motors" displacing 409ci and 427ci (the latter was the only version really raced). The Mark Three would have been a Packard design and tooling, however, GM said no to this one. It never got off the ground and that'south okay with us.
Before you is Chevrolet'due south Marker 4 big block, which was introduced in 1965 with 396 cubic inches. There was also the bottom-known 366 back in the day, which was a depression-revving truck engine designed to make good depression-end torque. The 396 swiftly led to what already existed in terms of displacement—the 427, which led to the 402 and 454 in 1970.
At the cusp of the 1990s, GM not just changed the proper noun "Marker" to "Generation," it as well changed the engine. The big cake Chevy (BBC) became the Generation V large block. The block got a one-piece rear main seal for leak prevention. Four-bolt main caps became standard on all one-piece rear master seal 1991-upwardly blocks, and that's okay with us too. The oiling system changed significantly for the better. GM changed the valvetrain from stamped steel rockers, to non-adjustable aluminum. There were also pregnant improvements to the block.
The lower displacement 366ci truck engine became the half dozen.0L. The 454 stayed. GM added the 502/eight.2L and 572/9.4L to its aftermarket performance parts partitioning, producing a new family of power stump pullers.
Making Affordable Big Block Chevy Ability
The large block Chevy has ever been about neat low- and mid-range torque—real street power where yous need it for the freeway and for the traffic calorie-free. However, the BBC tin also make loftier-rpm horsepower for the drag strip. Just you don't have to take this engine to vii,000 rpm to brand real power. Y'all can drop it into a classic Chevelle or a C-Series pick-up and scorch the earth at 5,000 rpm.
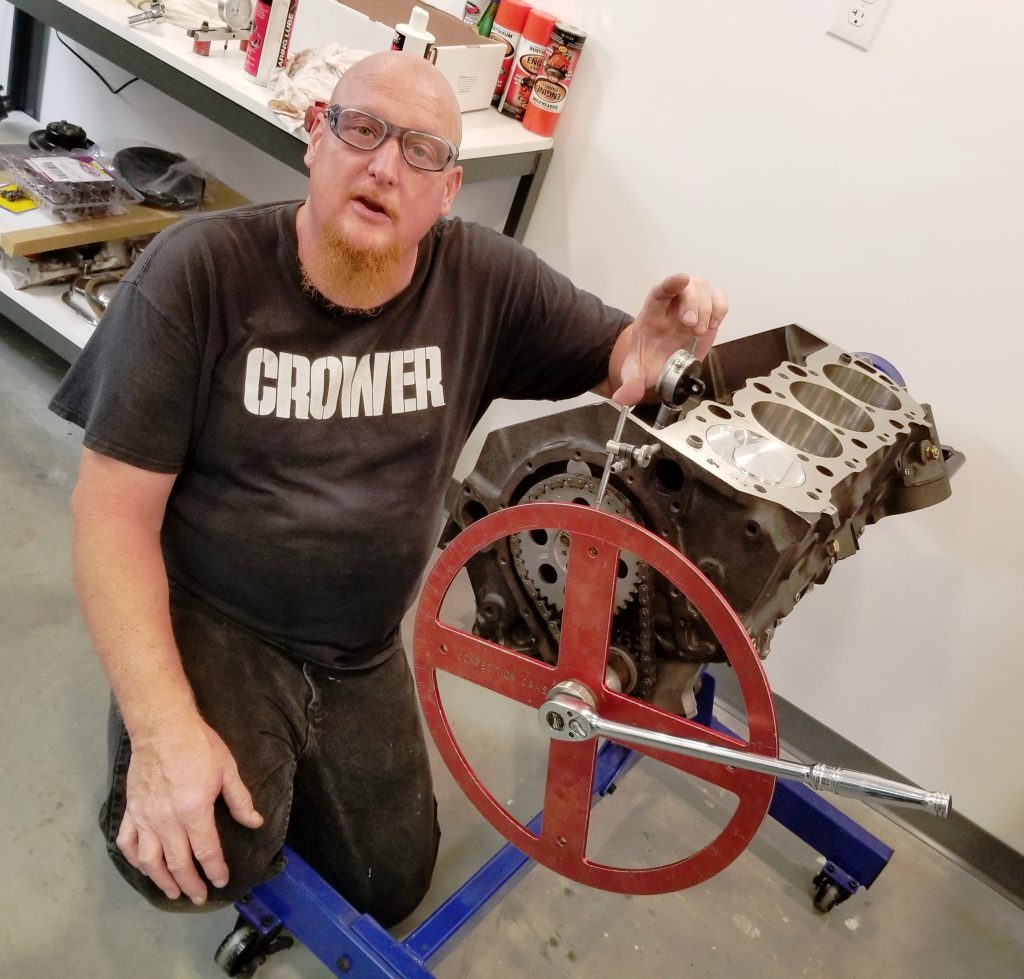
It is then easy to make power with this engine. We're with internal combustion technician Jeff Latimer in Los Angeles, California, building more Chevy iron like we've always done with this guy. Jeff's going to evidence you how to make plenty of torque without selling off the subcontract.
"I built this engine for a adept friend of mine. This was a junkyard engine and he had merely cleaned and painted it with a new intake, timing set, and oil pump." Jeff goes on to say, "He'due south putting information technology in a trunk-off full-calibration restoration on a 1967 El Camino. I felt his El Camino deserved better. I grabbed this engine and hauled information technology back to my shop."
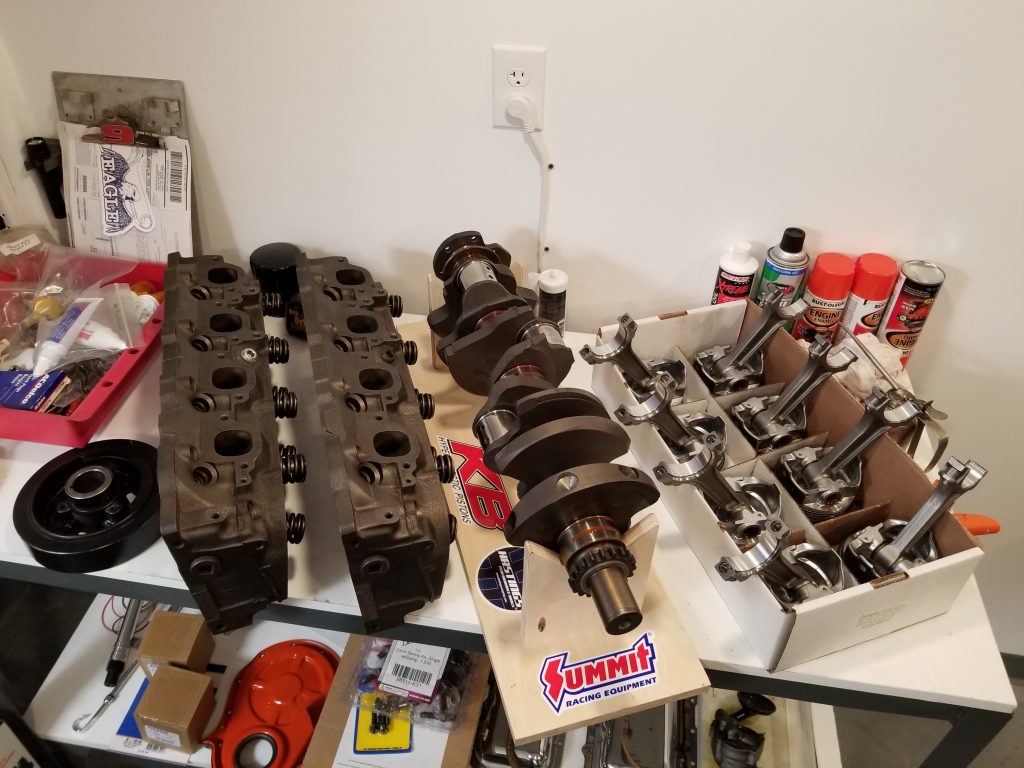
Jeff constitute a lot of problems equally he was tearing the engine autonomously. Information technology had badly blown caput gaskets. It was a 1980s vintage 454ci truck big-cake with pocket-size port heads. Information technology was never going to impress anyone the way it was. "I was able to source a pair of 1973 vintage large oval-port performance cylinder heads for this effort. The heads were rebuilt using Manley stainless steel valves to eliminate the expense of hardened exhaust valve seats. They were also machined and assembled with new Howard valve springs and Viton valve seals."
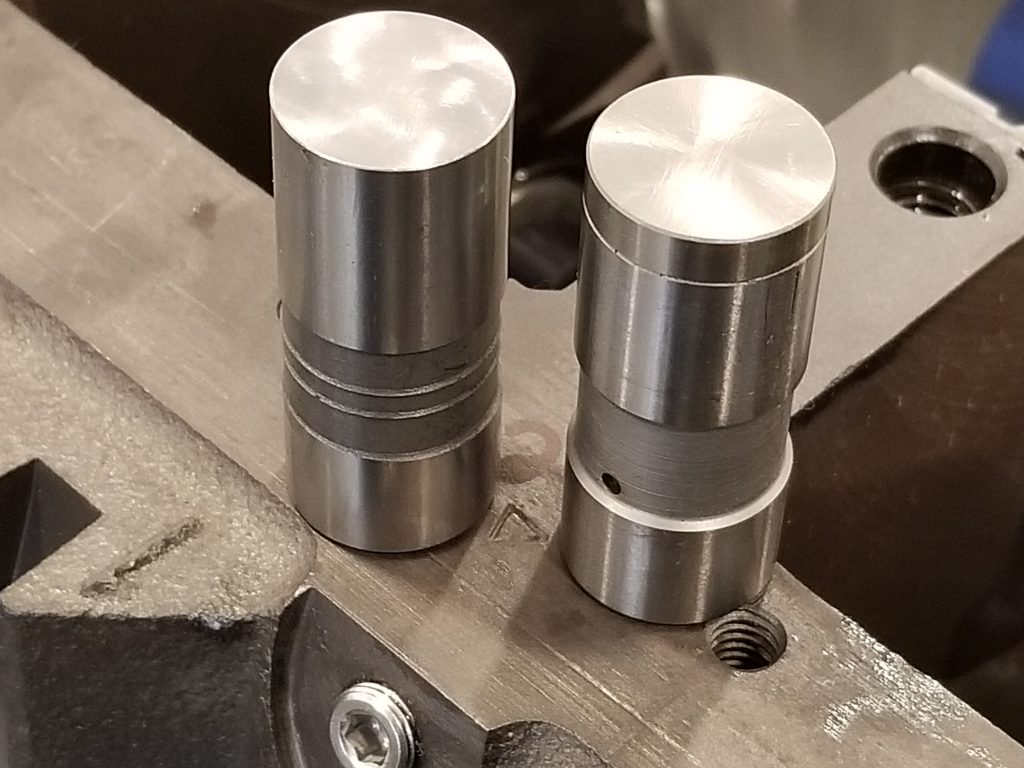
Down below, Jeff opted for a good flat tappet hydraulic cam from Howard'south Cams along with GM lifters, which Jeff feels are the best choice. "I used genuine GM hydraulic lifters because they are in my opinion the only ones to utilise on a Chevy with a flat tappet cam. They have a separate hardened face at the base of the lifter."
"A big block Chevy with a 1.7:1 rocker ratio is one of the engines that could have the cam go apartment during suspension-in. I opted for better quality OEM and aftermarket parts." He went on to tell usa the stock ane.7:1 stock rocker ratio worked just fine with the grooved rocker fulcrum balls for durability. Stock pushrods were as well cleaned and reused in the interest of saving coin.
"The engine was dyno'd for camshaft burglary with Driven BR30 oil, so, changed with Valvoline VR1 10w30 weight Loftier Zinc oil, which is something you should do with any flat tappet camshaft in the interest of durability," Jeff comments.
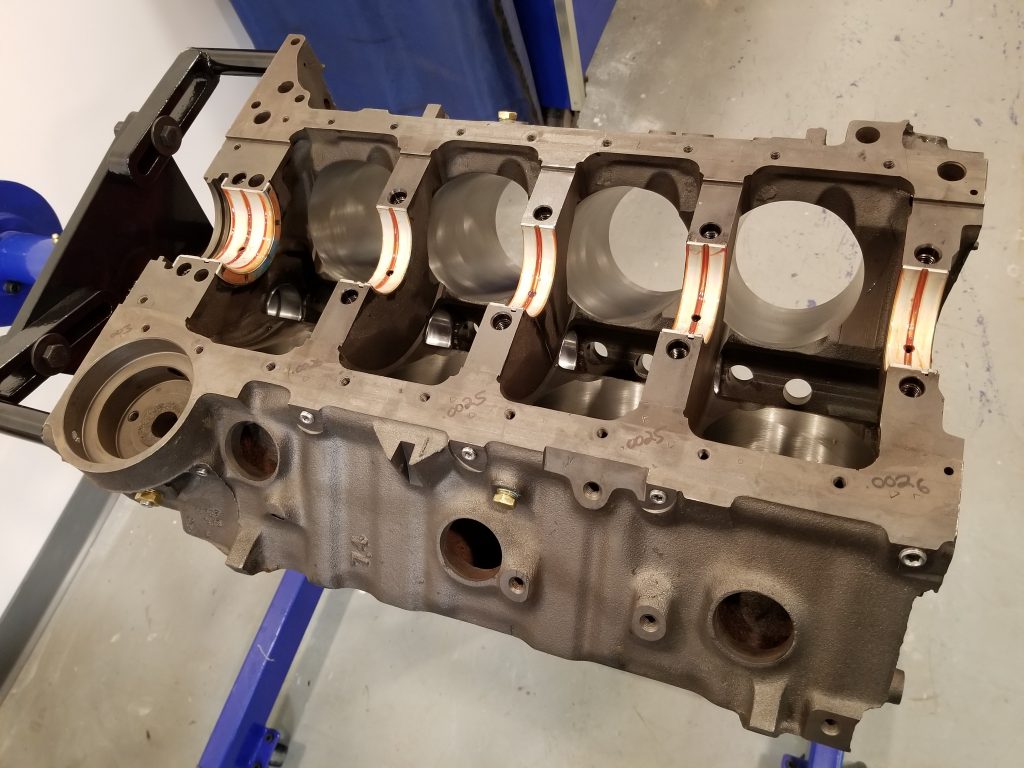
Jeff added the cake was thermal cleaned and magnafluxed at JGM Functioning Engineering, then, bored and honed for the Keith Black .030-inch over forged pistons with floating pins and 1/16 x 3/xvi-inch depression friction rings. The cake was besides decked to achieve a tight quench.
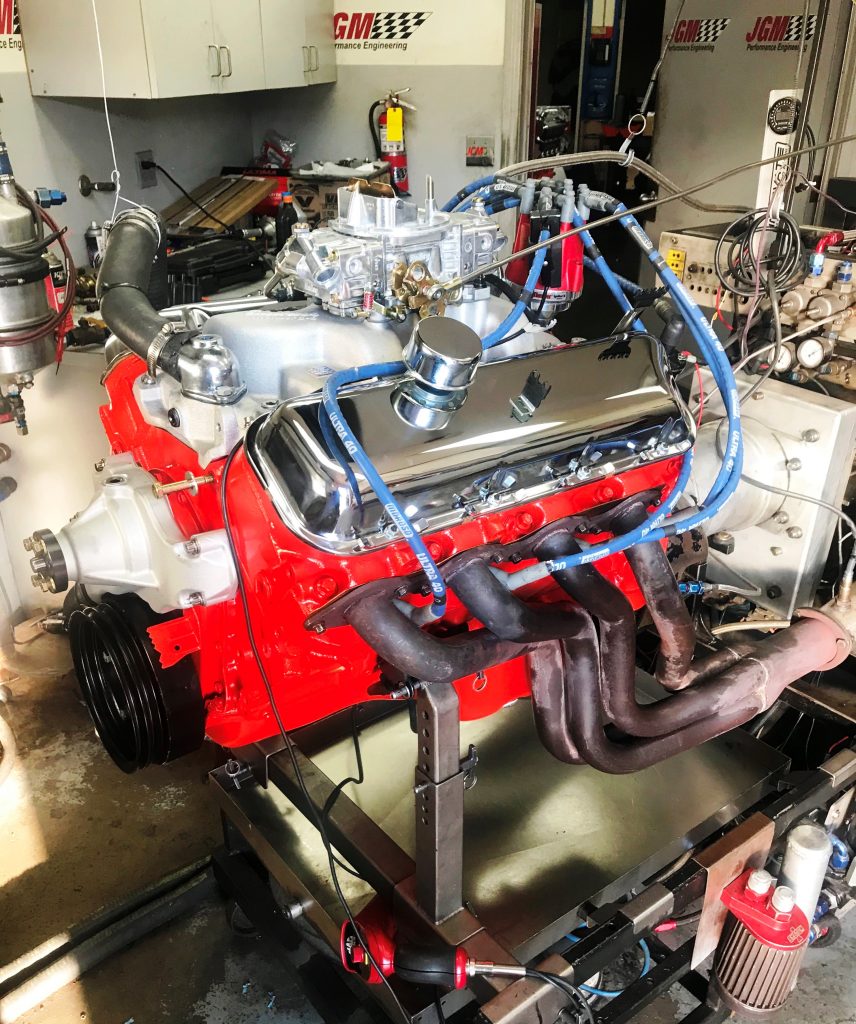
Jeff tells us this is not a racing engine and shouldn't be treated similar i. It is congenital for cruising and beast acceleration for the freeway and open up road. "It's for cruising…" Jeff confirms. On JGM's dyno, the 454 made 410 horsepower and 545 lbs.-ft. of torque. Information technology did all of this at well under half dozen,000 rpm. What'southward more than, it volition turn these numbers all day long on pump gas.
Chevrolet 454 Street Torque Recipe
1987 7.4L #14015445 Block
1973 #353049 Oval Port Head Castings (122cc chambers)
Manley ii.065″ Intake Valves, Man-10714-viii
Manley 1.725″ Frazzle Valves, MAN-10717-8
Howard Cams Flat tappet Hydraulic Cam, HRS-120021-12
Cam Specifications:
Valve Elevator: 0.476″ Intake/0.516″ Exhaust with 1.seven:ane Rocker Ratio
Lobe Lift: 0.280″ Intake/0.303″ Exhaust
Duration @ .050″ 205 Intake/215 Exhaust
Lobe Centers: 112°
Stock Cast Iron Crank
Eagle I-Beam Rods with floating wrist pins for reduced friction, ESP-6135B
Keith Black (KB) Hypereutectic Pistons, UEM-KB201KTD-030
Edelbrock Performer Intake Manifold
Holley 770cfm Avenger Carburetor
Pertronix Ignition
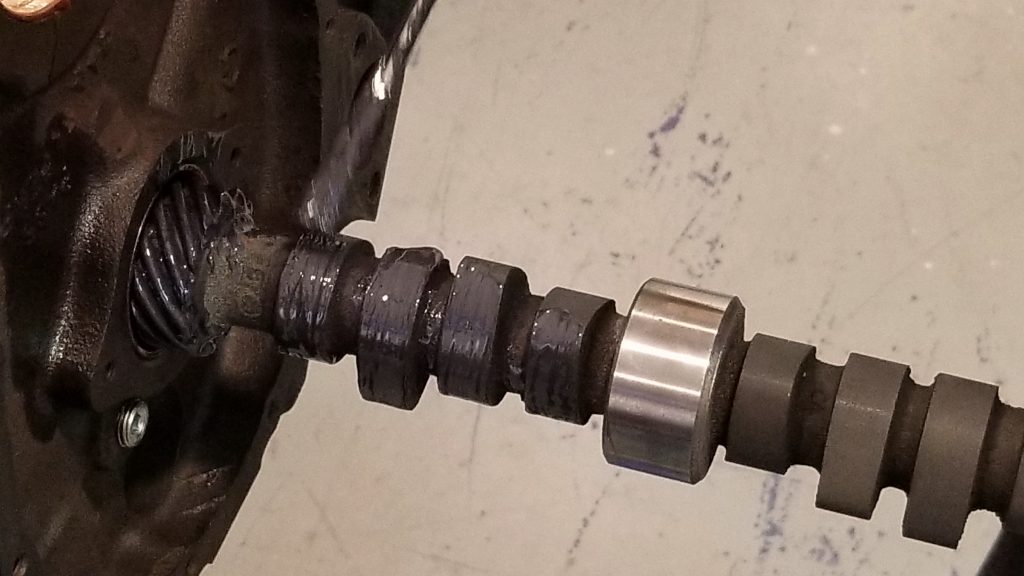
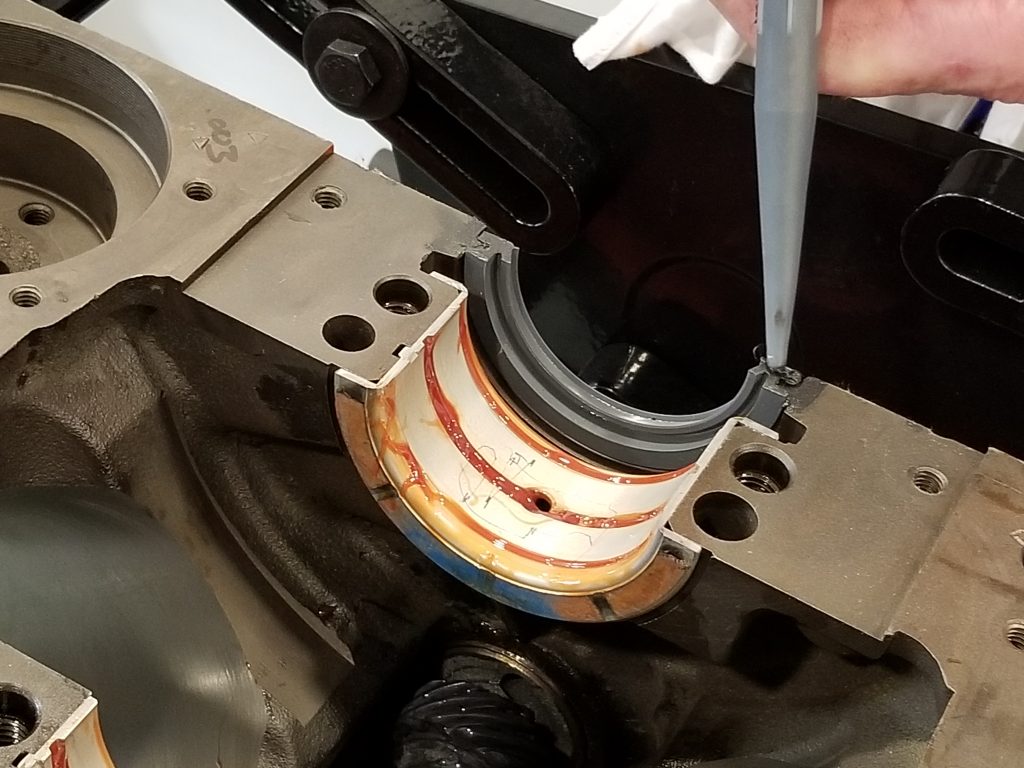
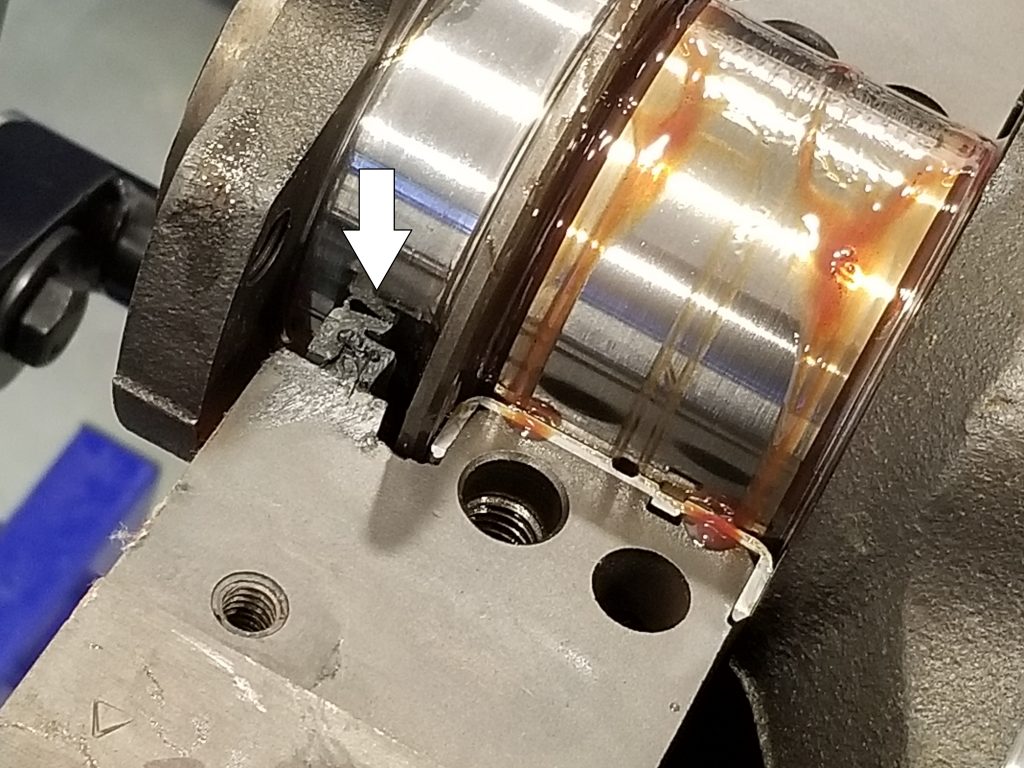
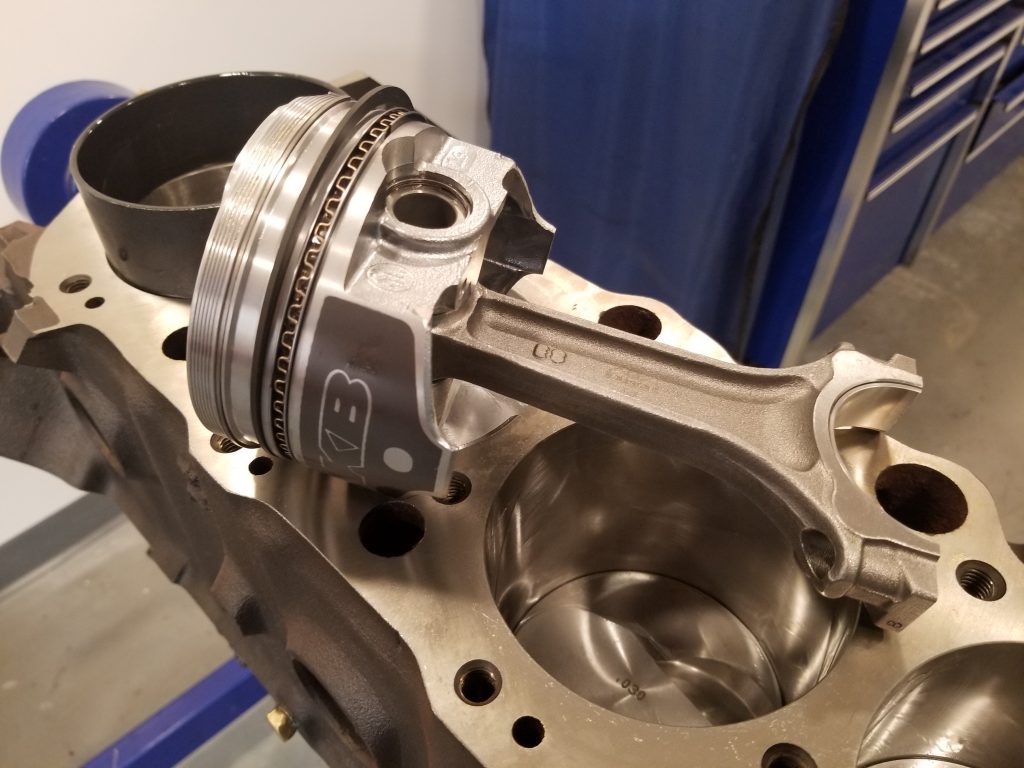
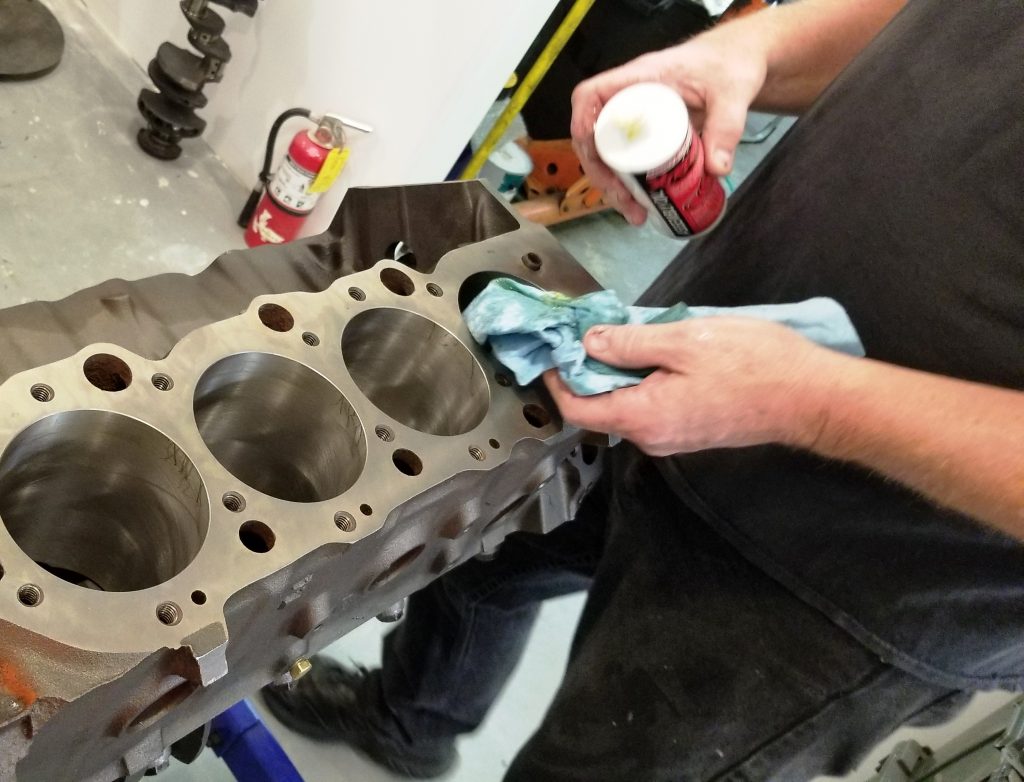
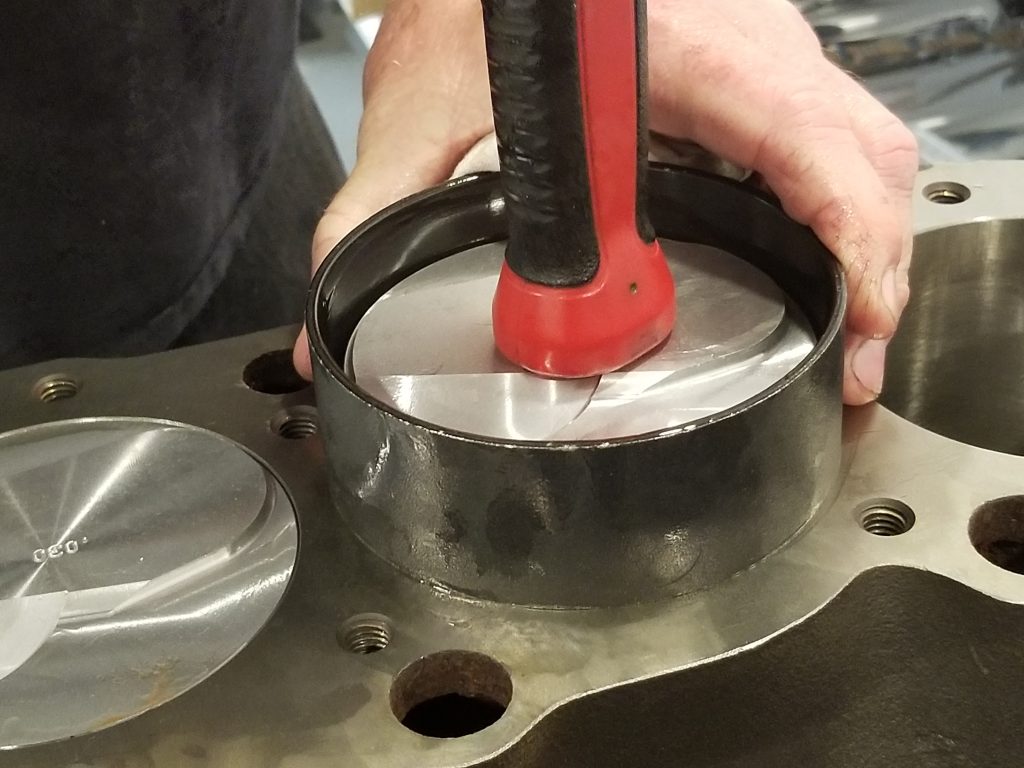
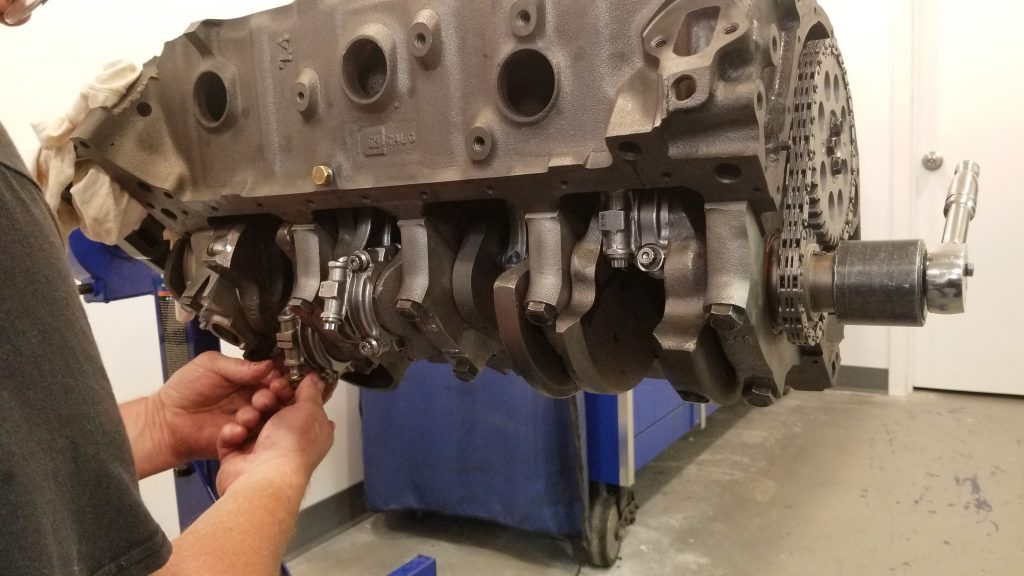
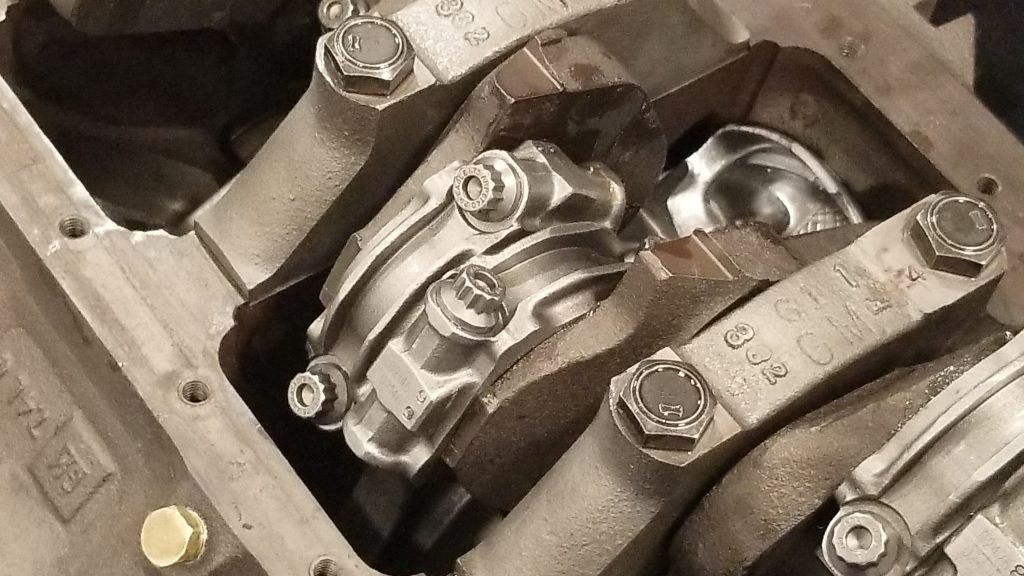
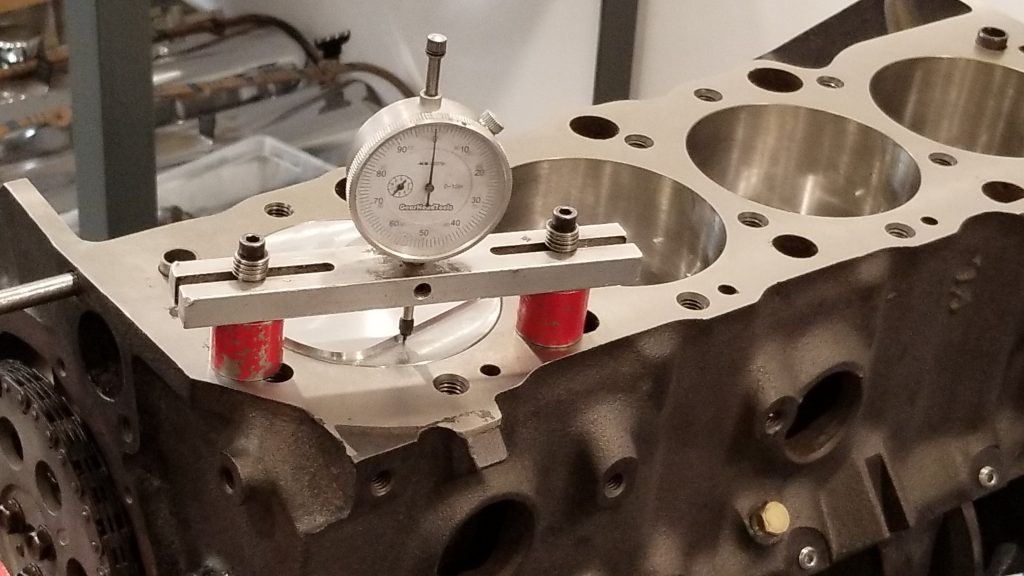
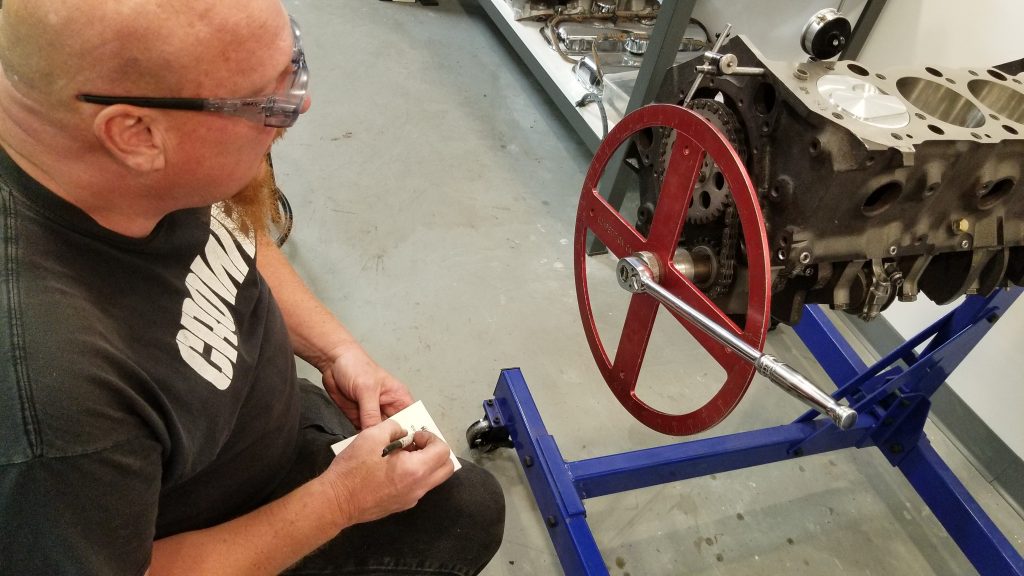
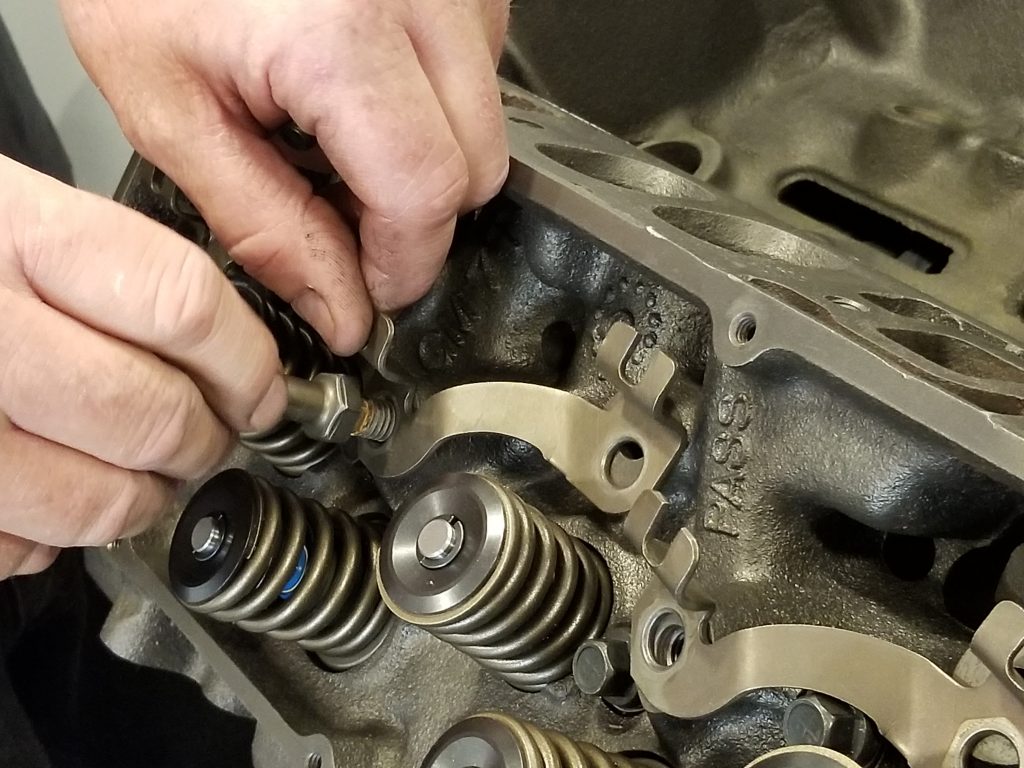
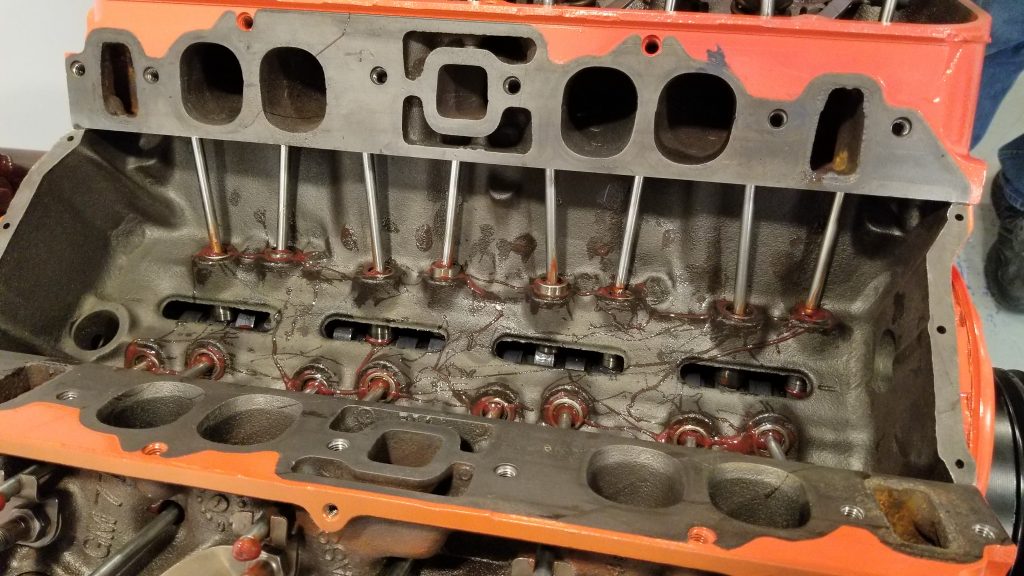
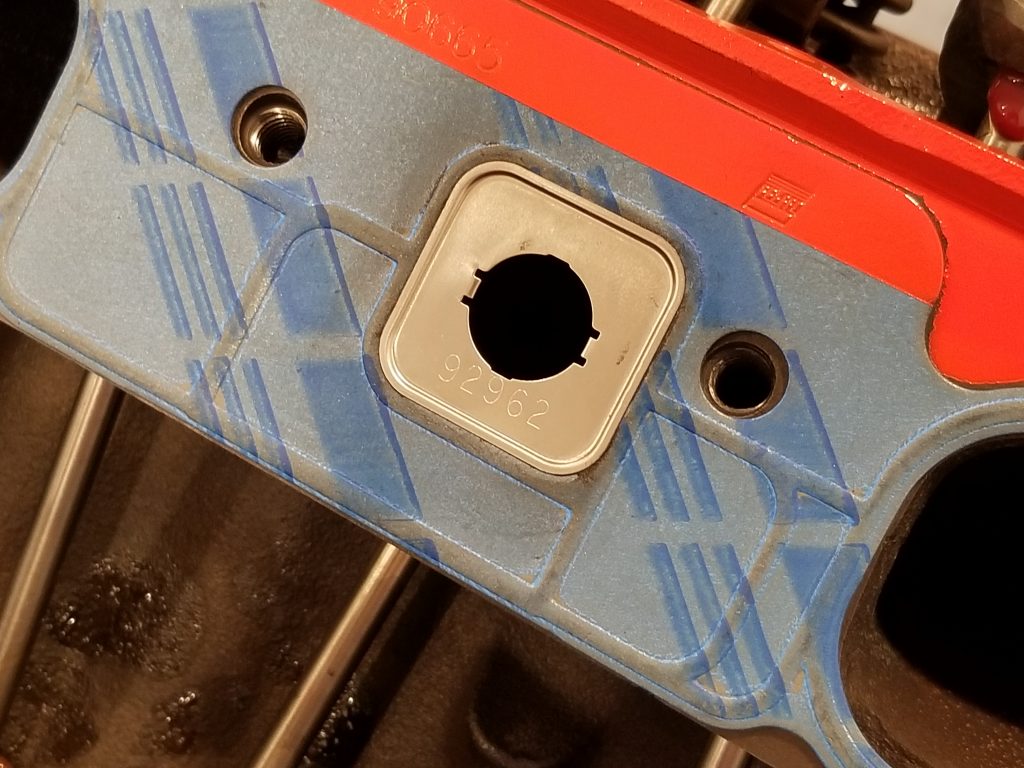
Our foundation for this BBC build is a 1987 vintage #14015445 454 block that has been precision machined by JGM Performance Engineering science in Valencia, California. (Epitome/Jim Smart)Hither are all the goods for solid reliable Chevrolet ability. A stock polished cast fe crank, Hawkeye I-axle rods, KB hypereutectic pistons, and a host of Summit Racing parts within. Jeff was able to get it all from Meridian Racing. What'due south more, this classic big block doesn't take to be erstwhile school either. You can top this guy with carburetion or electronic fuel injection. (Epitome/Jim Smart)We like these traditional #353049 big-Chevy heads with their 122cc chambers, 2.065/1.725-inch stainless valves, and 255/119cc volume intake/exhaust ports. No port work done here because it is unnecessary. This guy will make a tremendous amount of power without going much over 5,000 rpm. (Image/Jim Smart)Jeff'southward running a Howard'south Cams flat tappet cam (#12002112) with 112° LSA and GM hydraulic lifters for durability. This cam promises enough of low-end torque and comes on strong at high rpm. Jeff uses moly lube on the cam lobes and engine assembly lube on the journals. He used a proficient break-in oil with plenty of zinc for the initial burn-upward. (Image/Jim Smart) We've worked with engine builders who suggest staggering the rear main seal ends with 2-slice rear mains to preclude leaks. Jeff tells us you run the risk of having the seal halves agglomeration up and misconstrue at the ends that manner. He suggests having the seal ends cease-to-terminate where the #v chief cap meets the cake and using a daub of Permatex Correct Stuff Gasket Maker at the seal ends. Yous also want to apply a thin layer of sealer between the cap and block. (Epitome/Jim Smart)Jeff demonstrates his arroyo to rear main seal installation, with seal ends positioned at the cap and block contact points. The seal lip must be pointed toward the crank. Crankcase pressure leans on the seal lip to further secure the seal and foreclose leaks. Sealer must likewise be practical betwixt the cap and block. (Prototype/Jim Smart)Crankshaft endplay is checked, which should be .004- to .008-inch. (Image/Jim Smart)Jeff opted for a stock timing set. At that place wasn't the need for a dual-roller. Chevrolet tells us to get the cam and crank sprockets with the timing marks together—12 o'clock at the creepo and six o'clock at the cam sprocket. True accuracy comes when nosotros bank check for true top-dead-center and caste the cam. These timing marks are a starting point. (Image/Jim Smart)Budget doesn't have to mean cheap. Jeff opted for immovability with Keith Black hypereutectic pistons with coated skirts for reduced friction forth with Eagle rods, which involved less expense than if he would have had the rods reconditioned and fitted with new ARP bolts. This is coin well spent in the long run for durability. (Image/Jim Smart)Jeff pushes the issue of cleanliness because even the almost finite elements can harm an engine. I've learned from other builders that even uncomplicated house grit will score bearings and cylinder walls. Here, Jeff does a thorough wipedown with a tack cloth and Akerly & Childs ring lube until cylinder walls come clean and are lubed. (Image/Jim Smart)Jeff maintains a battery of more common sized billet piston ring compressors. This makes quick piece of work of engine associates. The band compressor and piston are generously bathed with ring lube for ease of installation. (Image/Jim Smart)Rod bolts are manus-snugged, and then, torqued to specifications. Jeff has chosen Clevite CLE-CB-743P rod bearings for this street 454. (Image/Jim Smart)Jeff has chosen Hawkeye #SIR-6135B I-Axle connecting rods, which are optimum for this detail 454. These new Eagle rods cost about the same equally reconditioning the 454'southward factory rods and you wind up with a better rod. These are cracking rods for the money. (Image/Jim Smart)Eagle connecting rod bolt threads are moly lubed, then torqued to 63 ft.-lbs. in 1-3rd values, then, rechecked. (Epitome/Jim Smart)
Getting True Top-Dead-Center
(Image/Jim Smart)
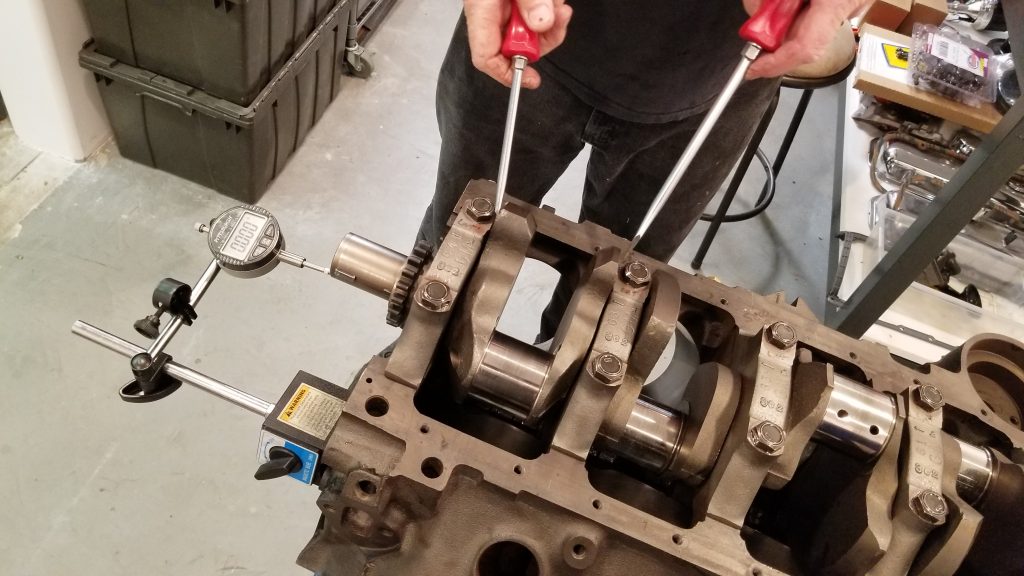
Before you tin degree the cam, Jeff stresses you must offset ascertain true top-dead-center (TDC) at #1 cylinder. He adds if this isn't correct, zip else will be correct in terms of cam timing. You're going to need a dial indicator and a degree wheel forth with a span-way mountain in order to check true TDC.
Get the dial indicator centered on the piston, with the piston at TDC.
Slowly crank the engine until the piston reaches its maximum top—which tin be in a higher place or beneath deck.
Install a caste wheel with a pointer fastened to the block. Ready the degree wheel at zero. Zero the dial indicator.
Slowly creepo the engine backwards until the piston travels .050-inch downward. Note the indication on the degree wheel.
Slowly turn the crank back until the piston tops out and so descends in the diameter .050-inch. Notation the number on the degree bike.
If the degree bicycle reads the same on both sides of top-dead-center (TDC), you've found true TDC.
If the numbers exercise non friction match, adjust the caste wheel until they do lucifer.
"In reality, when I plough the engine backwards, I would probable go .100-inch down in the diameter, and then, plough information technology dorsum until it read .050-inch," Jeff tells us. He adds, "Determining true TDC is vital earlier degreeing the cam because all your numbers would be adversely affected by slack in the timing chain." He goes on to say, "This is not necessary when checking TDC, but information technology is the only style to do it when checking camshaft numbers. It is always best to check truthful TDC while turning the creepo in normal operating management."
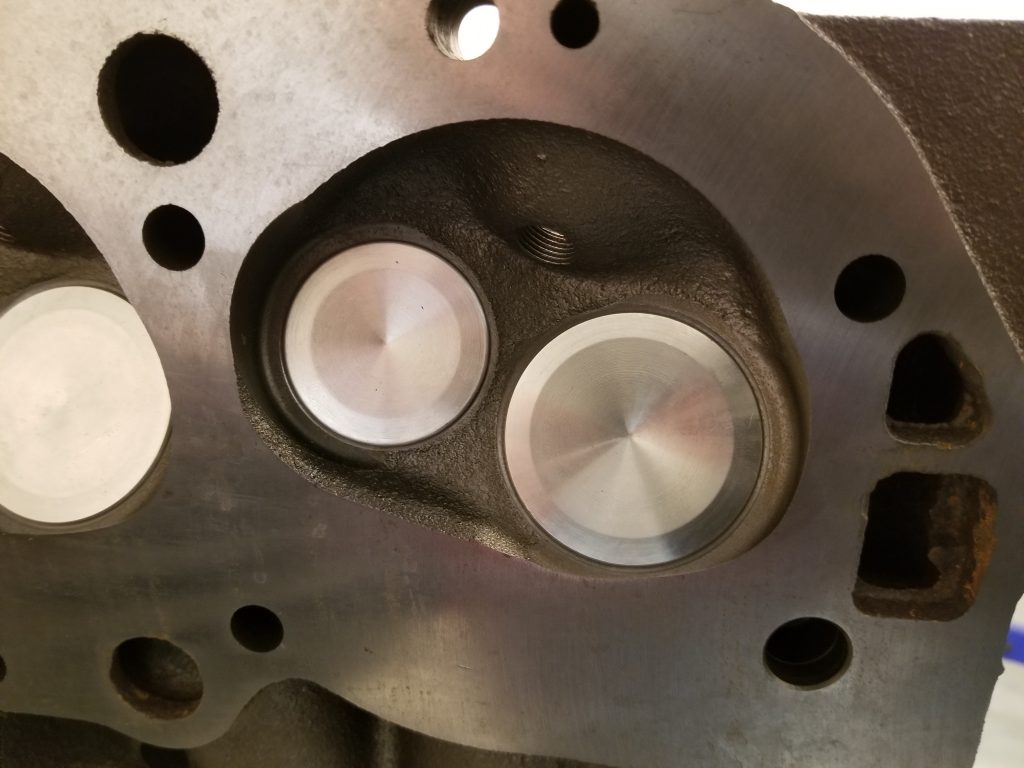
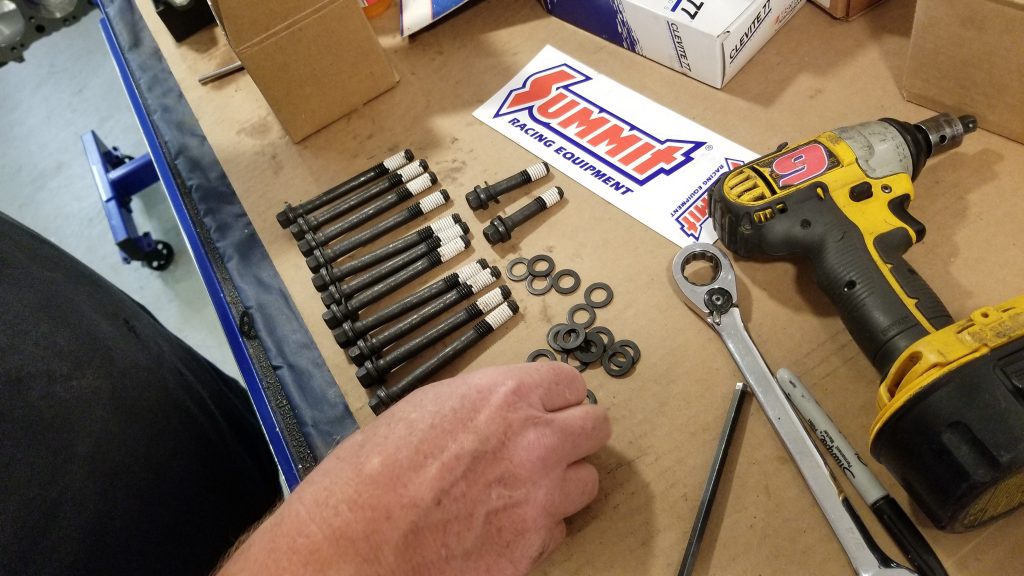
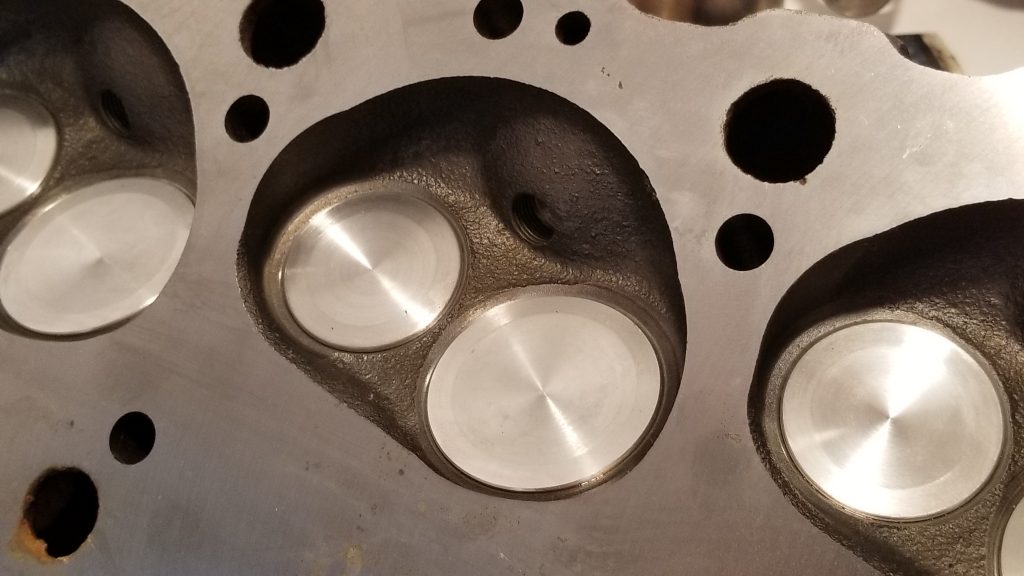
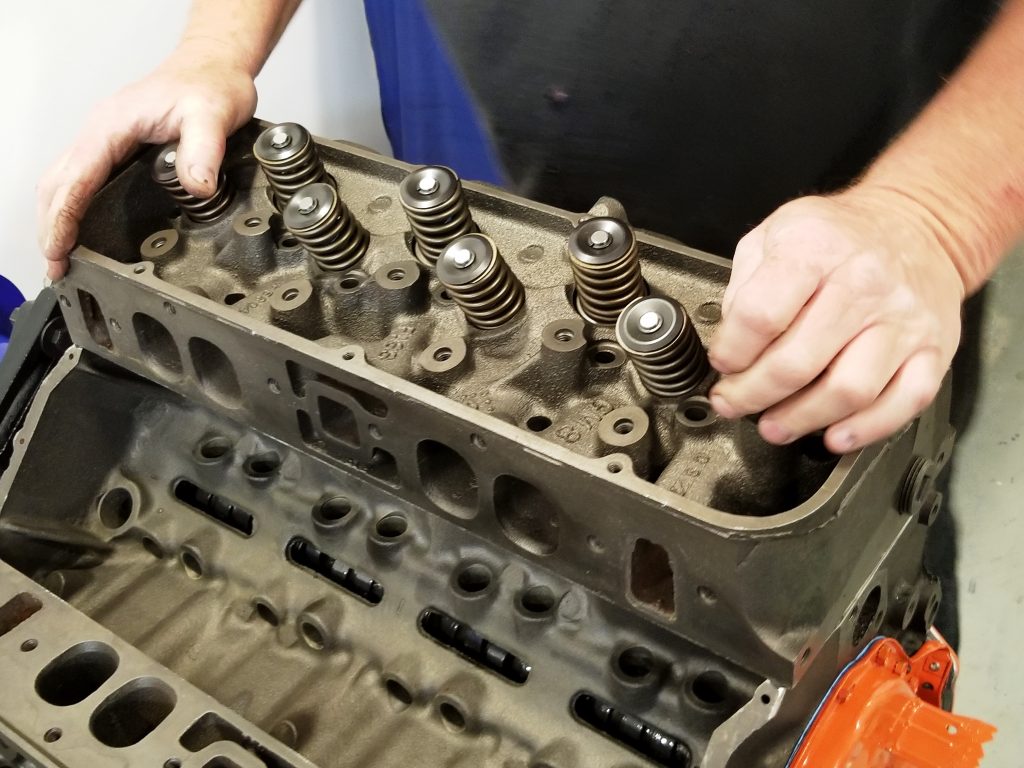
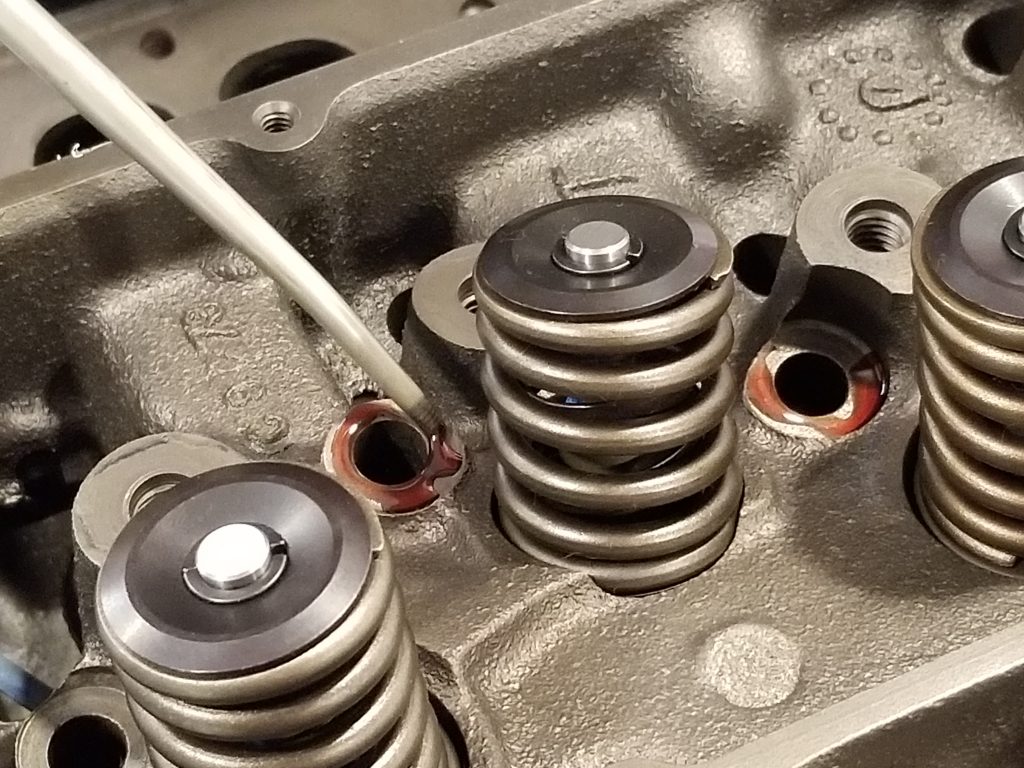
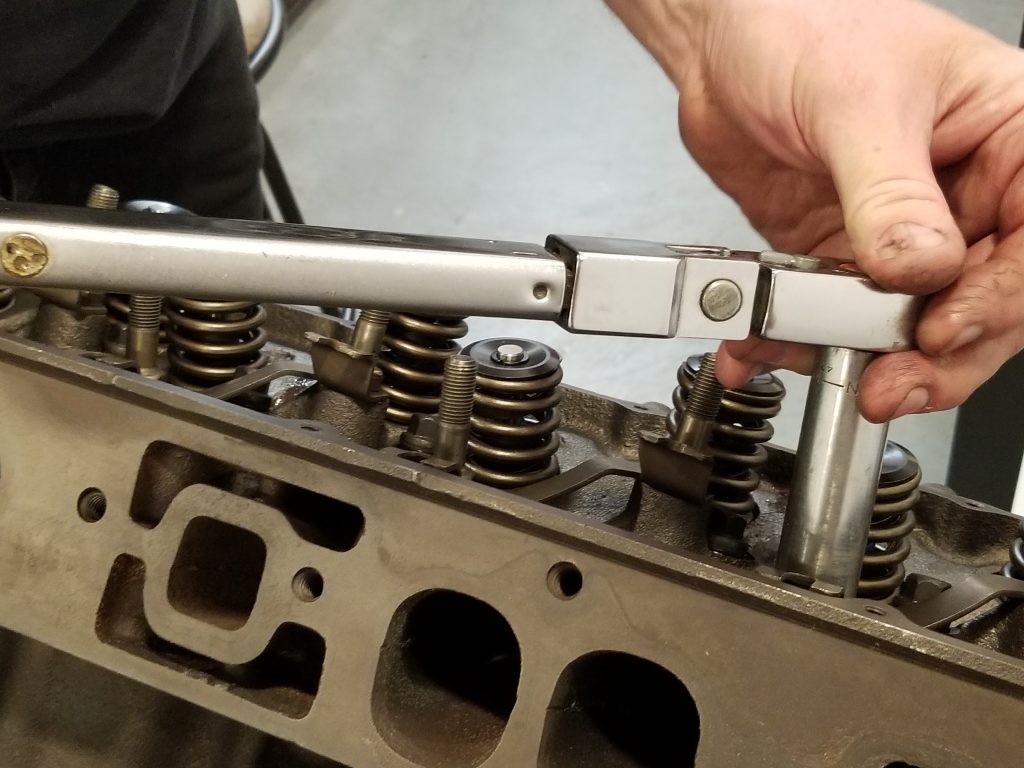
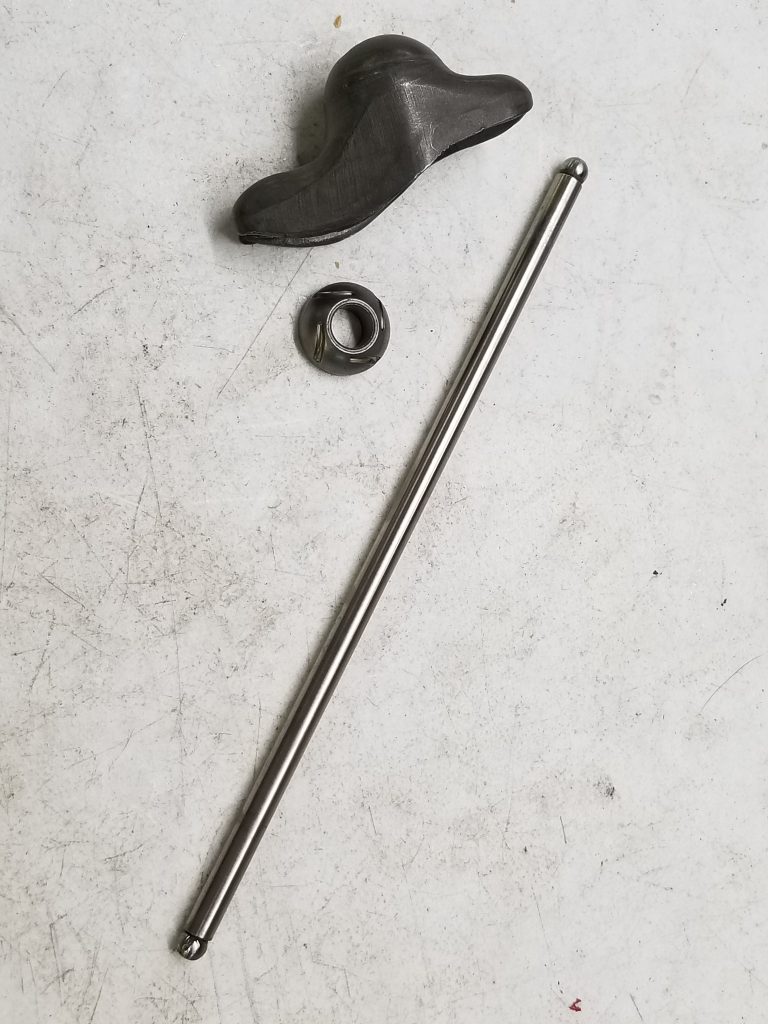
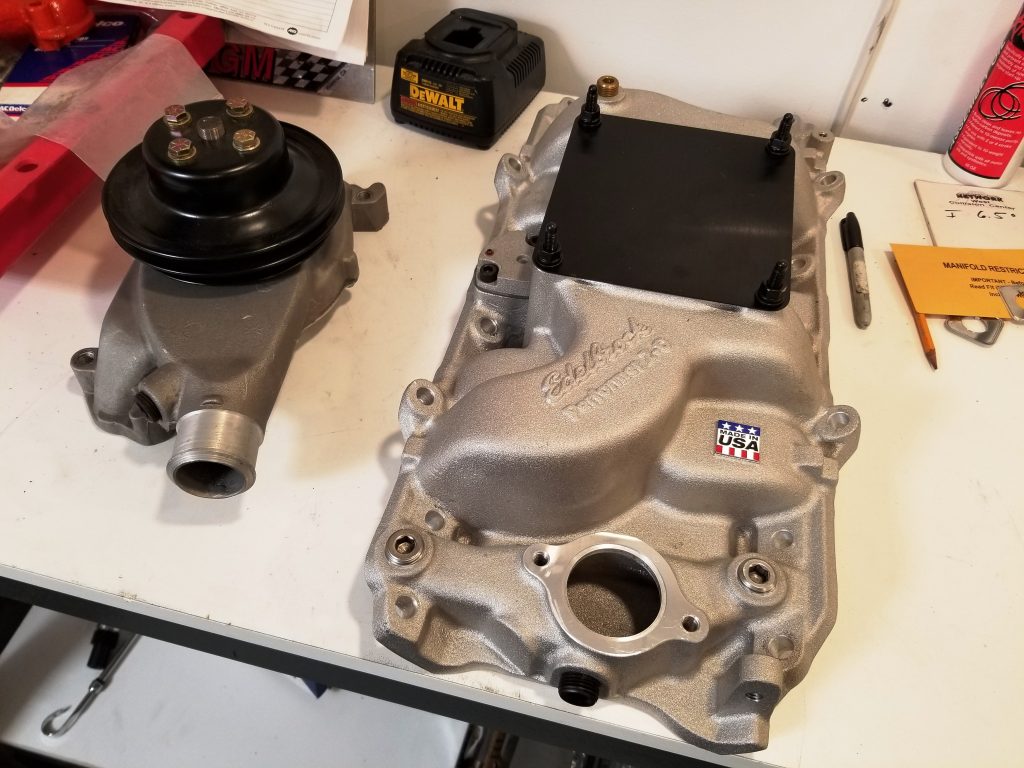
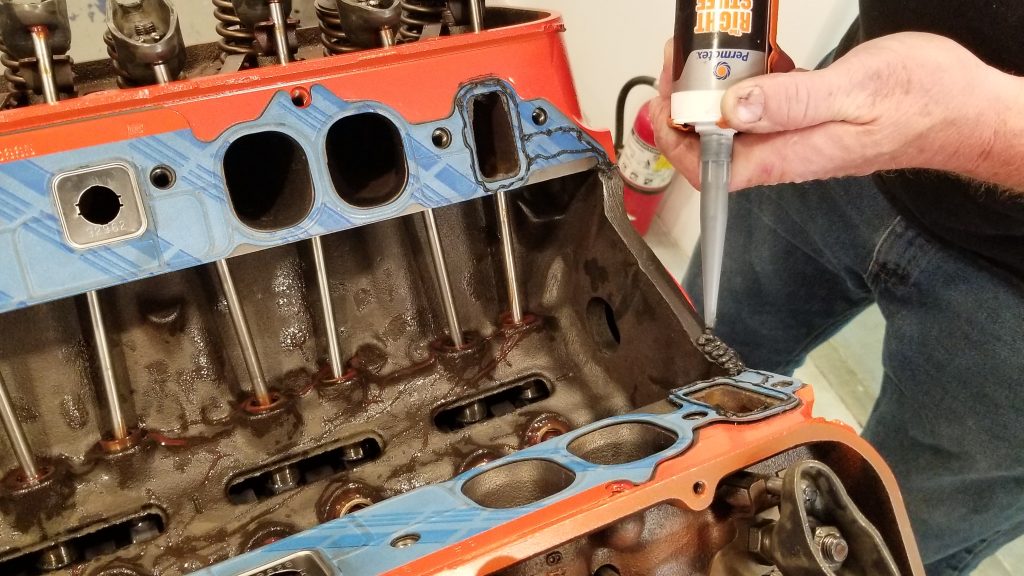
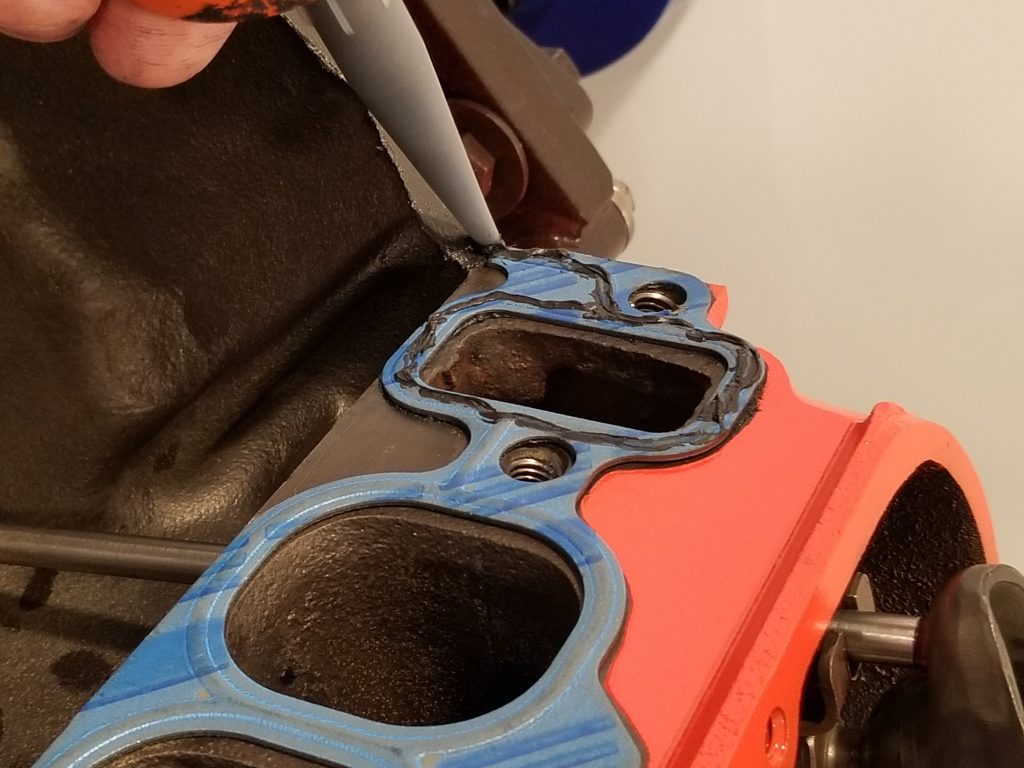
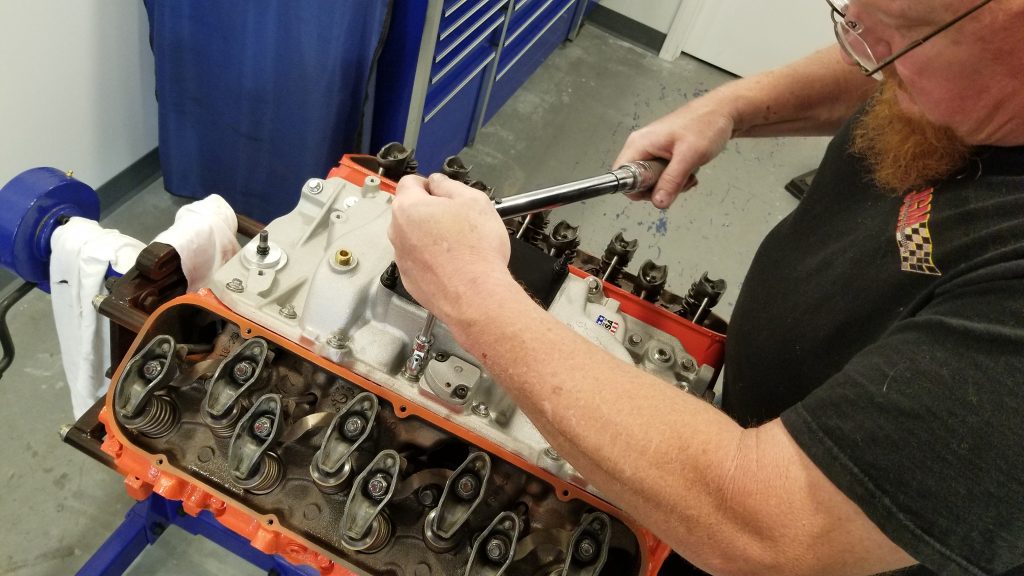
Every camshaft should be degreed to accurately make up one's mind valve timing events and how they relate to the manufacturer'southward cam card. Rare is the production camshaft that is spot on per the cam menu. Once you lot sympathise actual cam timing events, it becomes easier to make up one's mind what needs to happen adjacent. (Image/Jim Smart)Jeff is using Dorman cylinder caput bolts from Meridian Racing. These bolts are moisture-deck set with Teflon on the commodities threads. Cylinder head commodities torque is 75 ft.-lbs. long bolts and 65 ft.-lbs. for the short ones tightened in proper sequence using sealer on the threads. Torque them in 1-third values, then, recheck final torque. (Paradigm/Jim Smart)Time proven Fel-Pro cylinder caput gaskets are a make nosotros look to fourth dimension and time again considering we don't desire the disappointment of leaks. Jeff has checked contact surfaces for cleanliness. He has practical Permatex "The Correct Stuff" gasket maker to the corners (arrows), which tend to leak if assembled unprotected. (Image/Jim Smart)These 1973-vintage 454 cylinder heads have the 122cc chambers, which is what you want for your 454 project. We have 8.8:1 compression. Chambers became larger in the mid-1970s, which means a greater loss of compression. The quickest path to power is pinch. (Image/Jim Smart)Cylinder heads are seated at this fourth dimension. Install all bolts and manus snug for security. (Image/Jim Smart)Jeff lubricates commodities/washer contact surfaces to ensure honest torque readings. Never tighten bolts dry. (Image/Jim Smart)There'south a lot to be learned about applying fastener torque. Never wiggle a torque wrench to get the click. Apply nice smooth torque to the fastener and practise information technology in 1-third values. Over again, in one case all fasteners are torqued, go back and check torque readings. (Epitome/Jim Smart)Jeff stresses the utilise of 18-carat GM tappets if you lot're opting for a apartment-tappet camshaft. Employ moly lube to the lifter contact surface and fill the pan with a zinc condiment engine oil when the time comes to burn the engine. GM lifters have a hardened base, which can handle the torture of a rough ride over the cam lobe. Roller tappet engines do not require moly lube or zinc. (Prototype/Jim Smart)Nosotros've opted for stock GM valvetrain components. Before you here is a ball-blazon pushrod, which is fine if you're on a tight upkeep. Stamped steel 1.7:1 GM rockers will be adequate for what our 454 is expected to do. (Image/Jim Smart)Screw-in rocker arm studs and guide plates will keep pushrods centered and in perfect alignment. (Paradigm/Jim Smart)Jeff stresses the utilise of the right lubricants during assembly. Cam lobes and lifter contact surfaces get moly lube (molybdenum grease) for proper break-in and piece of work-hardening of cam lobes and lifters. Lifter bores and pushrod tips get engine assembly lube. (Image/Jim Smart)Valve adjustment is best taken one cylinder at a time. Take valve adjustment one cylinder, one bank at a fourth dimension. Slowly crank the engine. As the intake valve is endmost, adjust the exhaust valve. Every bit the frazzle valve is opening, adjust the intake valve. For mechanical lifters, use a thickness judge. With hydraulic lifters, slowly tighten the rocker arm aligning until you can experience a slight preload at the pushrod. The rocker arm adjustment tin can be anywhere from nada lash to a half-turn. For racing, zero to an 8th-turn. For street, a quarter-turn. (Image/Jim Smart)Because we want a adept power ring, Jeff suggested the Edelbrock Performer for big cake Chevys. This is a dainty dual-plane manifold, which is terrific for street and strip. It delivers great depression- to mid-range torque while coming on stiff at high rpm. It is all done around five,500 rpm. The big cake Chevy doesn't take to rev sky-loftier to make arable power, which is neat for your Camaro, Nova, Chevelle, or C-Series truck. (Paradigm/Jim Smart)Although gasket sets include end gaskets, nearly of usa never utilize them. Jeff applies a bead of Permatex's The Right Stuff, which is the just sealer to use. He applies only plenty to make full the gap between manifold and block, and then, wipes the bead clean. (Image/Jim Smart)Jeff uses modest amounts of Permatex The Correct Stuff around cooling passages. (Image/Jim Smart)It is a matter of personal option whether you lot utilize the estrus riser passage or non. Fel-Pro provides this reducer to limit exhaust heat to the intake manifold. You can completely block off the heat passage, which will help your intake manifold run cooler. (Image/Jim Smart)Torqueing the intake manifold is not a chore to be taken lightly. Once the manifold is seated, fasteners are snugged to get the manifold fully seated. Total torque is 25 ft.-lbs. with the bolts tightened in crisscross fashion. In one case over again in one-tertiary values. Never over-torque intake manifold bolts. Check them twice once tight. (Prototype/Jim Smart)Dyno time at JGM Performance Engineering netted 410 horsepower at four,800 rpm and 545 lb.-ft. of torque at 3,400 rpm. Terrific depression- to mid-range street torque. This works exceedingly well in both a C-Series option-up or a classic Chevelle, Camaro, or Nova. You go good street power where you demand it most without spending a fortune. (Image/Jim Smart)


Post a Comment for "whats the specs on how to build a 477 big block chevy"